Block Dipstick Tube Installation using BPI-1001
Start by lightly sanding /polishing the larger end of the tube so it will slide in a little easier.

Next, insert the small end of the tube into the dipstick tube opening in the block. Position the tube with the angle of the tube facing toward the front of the block.

We painted our tube prior to the final installation.
Slide the tube in and set your final angle/position.

Insert the BPI-1001 Installation tool into the large opening in the tube.

Ensure it is firmly in place and situated straight onto the tube.

Using a hammer, gently tap the tool to press the tube into the block.

Continue inserting the tube until it is just short of flush with the block

Dipstick tube should be properly installed with little effort and free of leaks.

Click here to purchase the BPI-1001 installation tool
Example of a either of the above blocks with an AAU-N302 installed. NON WINDAGE TRAY
After installing the block tube (AAU-N304) first, insert the lower tube (AAU-N302) into the block tube positioning the bracket into place over main cap #3. Secure with 5/16 x 3/4" bolts with washers using thread lock.


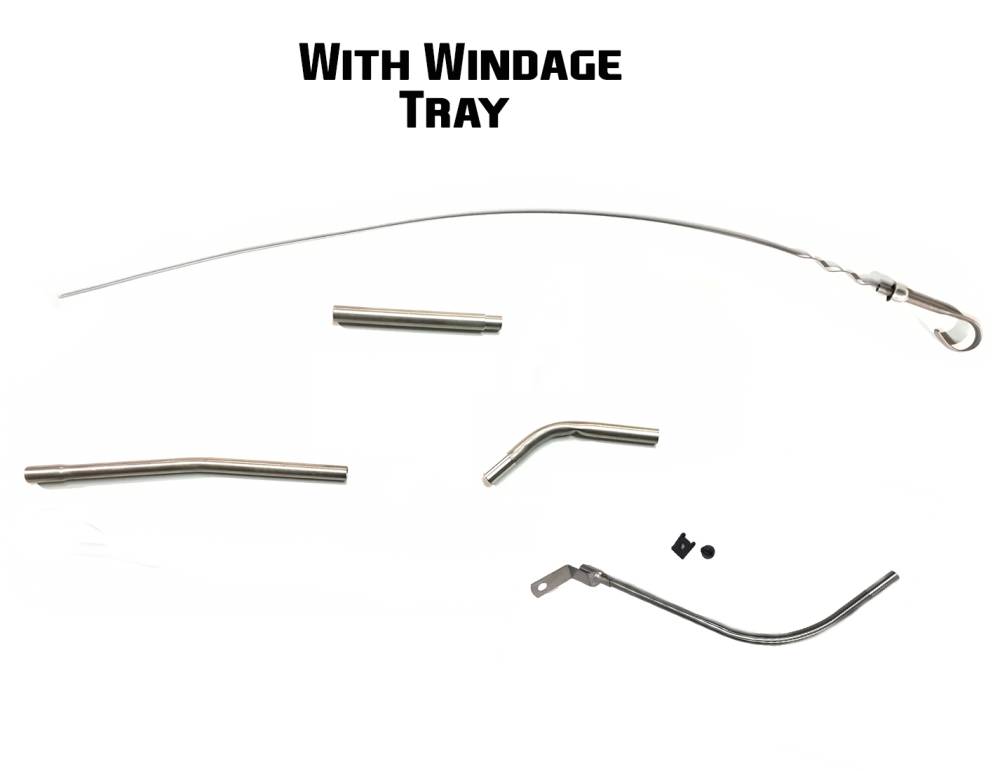
In this case the lower dip stick tube was held in by the windage trays. See the images below to see how the tube is held in place. This lower dipstick tube is part number AAU-N300 (for use with windage tray only, does not have the bracket).


After installing the block tube (AAU-N304) first, insert the lower tube (AAU-N300) into the block tube. Slide the windage tray over the tube and into position.
Some blocks came with windage trays from the factory. We do not recommend reusing a 40 year old windage tray. The metal can deteriorate and pieces can be introduced into the oil pan and rotating assembly area causing catastrophic failure. With the relatively inexpensive cost of replacement, it is worth replacing.
AC Tubes and Dipstick
The lower tube and block tube is the same on the AC and NON AC cars. The difference is in the 3rd tube called the upper tube. It slides into your block tube and mounts on or around your alternator in most cases. This makes the tubes substantially longer and the dipstick is longer as well. (BPI-9405-R4)
Drilling Main #3 for use with the N302 Lower Dipstick Tube with Bracket (No Windage Tray)
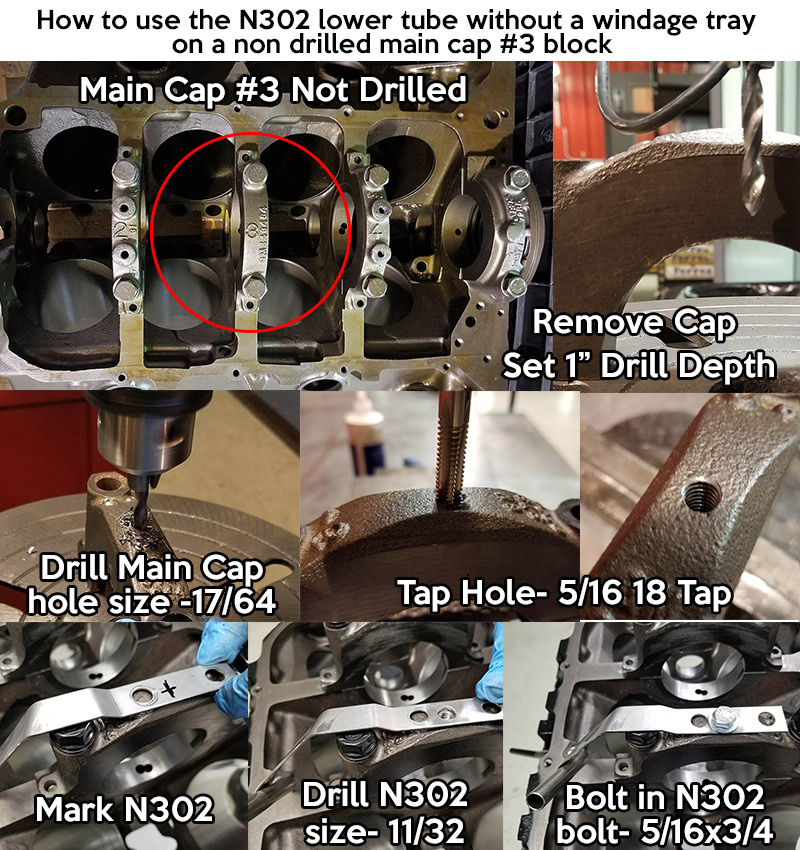
Main cap #3 will need to be removed then follow the directions below
Drill the center #3 main cap in the center using 17/64th drill bit at a depth of 1"
Tap the hole using a 5/16 18 tap. Ensure you clean the main cap and threads thoroughly before reinstalling so no trash gets into the block.
Install the main cap and temporarily fit the N302 so you can mark the bracket for the corresponding hole to be drilled.
Using a 5/16 x 3/4 bolt and washer, install the N302 using thread lock.